开发环境:Zend Studio 12.0.1
PHP运行环境:wampmanager
系统环境:windows7专业版
首先说说为什么用这2个软件。Zend已经集成了JDK和PHP语法插件,不需要额外再下载插件,非常方便。另外wampmanager程序,包含了mysql,php,apache。并且调试插件都已经就绪了。非常傻瓜化。如果要调试,仅需要以下几步即可!
一:安装以上2个程序,我的wamp安装在C盘根目录,下面就是C盘配置方法。如图:
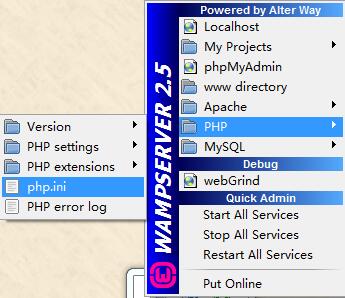
打开之后,只需要把xdebug.remote_enable = On 代码由原来的Off改成On即可,zend_extension在安装的时候已经自动配置了。以下是我配置的
zend_extension = "c:/wamp/bin/php/php5.5.12/zend_ext/php_xdebug-2.2.5-5.5-vc11.dll"
;
[xdebug]
xdebug.profiler_enable=on
xdebug.auto_trace=on
xdebug.collect_params=on
xdebug.collect_return=on
xdebug.show_exception_trace = On
xdebug.remote_autostart = On
xdebug.remote_enable = On
xdebug.collect_vars = On
xdebug.remote_enable = On
xdebug.profiler_enable_trigger = On
xdebug.profiler_output_name = cachegrind.out.%t.%p
xdebug.profiler_output_dir = "c:/wamp/tmp"
xdebug.show_local_vars=0
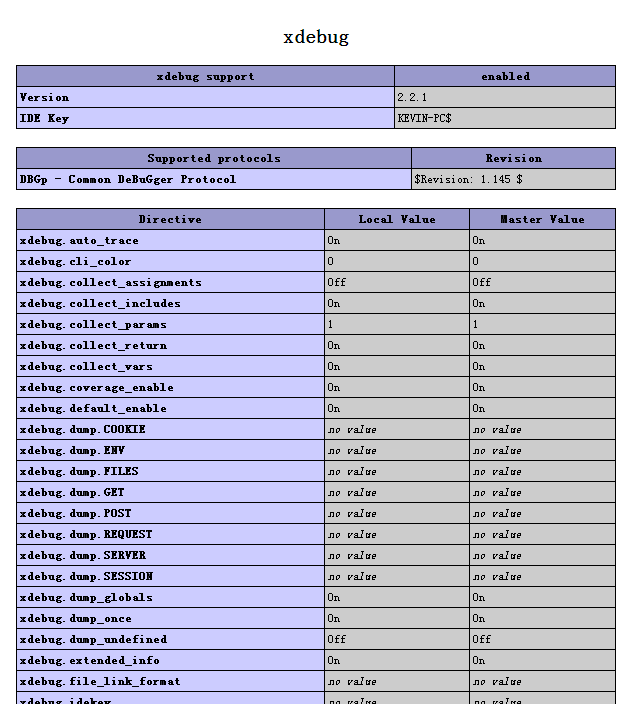
这步配置好了重启服务。看看phpinfo();
二:配置Zend Studio,2张图
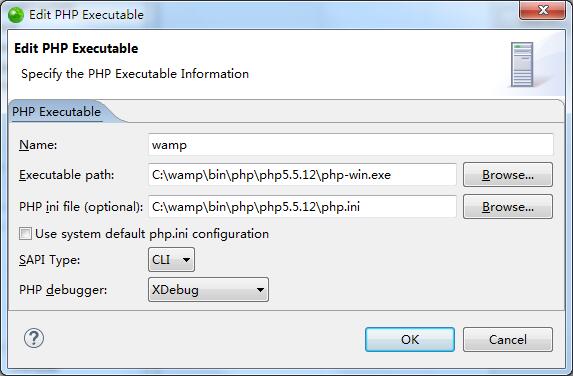
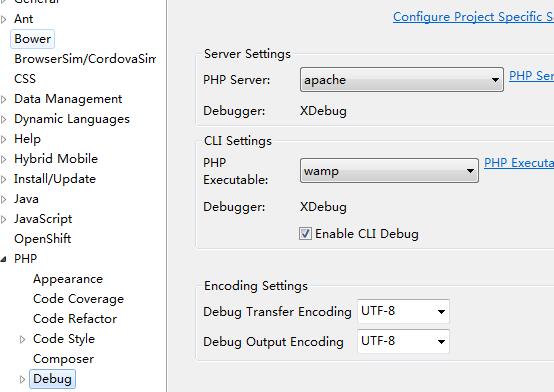
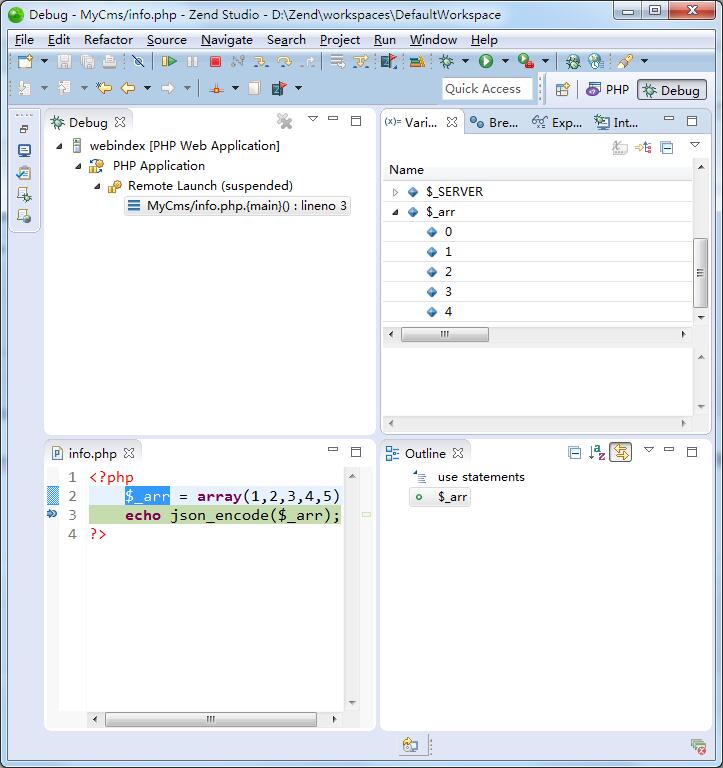
OK,一切就绪,现在创建一个新工程,然后在index.php中随便写点代码,右键,debug>php web application,然后就看来zend studio自动打开了刚才的页面,变量值也有了。
本文链接:https://www.it72.com/11349.htm