现在只要涉及到苹果,基本上无人不知无人不晓,其名气不可估量。笔者有过其它语言开发经验,对于ios也是比较好奇,于是决定
学习一翻。所以标题是零ios基础,大家不要吐槽。
我用的是VMWare安装的Mac OS 10.9,xcode是5.1.1,今天就开始进行苹果App开发。
首先简单的看了一下资料,简单的了解一下如何入手。首先打开xcode,create a new Xcode project.然后弹出一个窗口,左边选择
IOS->application,右边的窗口选single view application。那么就创建了一个单视图的程序,点下一步,然后产品名字随便填写,
device设备
选择iPhone,因为我们是对iPhone开发,而不是Ipad或者其它的设备。
创建好之后,我们可以看到左边有若干的文件,分别有.h和.m的。.h是头文件,你需要在里面定义变量或者函数相关的。.m文件是
具体实现.h定义的函数。
首先说下AppDelegate,这个是程序的入口,就是所有的view是建立在这个之上。ios称它为委托。这个有点像android里面的
application,所有的activity都是在它上面活动。
再看看这个ViewController,这个家伙继承了UIViewController,它的作用很显然是一个视力控制,就是所有的按钮啊,图片,列表都
在上面显示。这个应该和Android里面的Activity是一样的。不同的View显示不同的内容,比如LoginView,RegisterView等等……
现在在AppDelegate.h代码如下:
//
//  AppDelegate.h
//  XQQ
//
//  Created by leehom on 14-11-12.
//  Copyright (c) 2014年 ___FULLUSERNAME___. All rights reserved.
//
#import
#import "ViewController.h"
@interface AppDelegate : UIResponder
@property (strong, nonatomic) UIWindow *window;
@property (strong,nonatomic) ViewController *viewController;
@end
定义了一个window对象和一个ViewController对象,再看看AppDelegate.m文件内容
//
//  AppDelegate.m
//  XQQ
//
//  Created by leehom on 14-11-12.
//  Copyright (c) 2014年 ___FULLUSERNAME___. All rights reserved.
//
#import "AppDelegate.h"
@implementation AppDelegate
- (BOOL)application:(UIApplication *)application didFinishLaunchingWithOptions:(NSDictionary *)launchOptions
{
    // Override point for customization after application launch.
    self.window = [[UIWindow alloc]initWithFrame:[[UIScreen mainScreen]bounds]];
    self.viewController = [[ViewController alloc]init];
    self.window.rootViewController = self.viewController;
    [self.window makeKeyAndVisible];
    return YES;
}

- (void)applicationWillResignActive:(UIApplication *)application
{
    // Sent when the application is about to move from active to inactive state. This can occur for certain types of temporary interruptions (such as an incoming phone call or SMS message) or when the user quits the application and it begins the transition to the background state.
    // Use this method to pause ongoing tasks, disable timers, and throttle down OpenGL ES frame rates. Games should use this method to pause the game.
}
- (void)applicationDidEnterBackground:(UIApplication *)application
{
    // Use this method to release shared resources, save user data, invalidate timers, and store enough application state information to restore your application to its current state in case it is terminated later.
    // If your application supports background execution, this method is called instead of applicationWillTerminate: when the user quits.
}
- (void)applicationWillEnterForeground:(UIApplication *)application
{
    // Called as part of the transition from the background to the inactive state; here you can undo many of the changes made on entering the background.
}
- (void)applicationDidBecomeActive:(UIApplication *)application
{
    // Restart any tasks that were paused (or not yet started) while the application was inactive. If the application was previously in the background, optionally refresh the user interface.
}
- (void)applicationWillTerminate:(UIApplication *)application
{
    // Called when the application is about to terminate. Save data if appropriate. See also applicationDidEnterBackground:.
}
@end
这样就是手动关联view视图了。就是程序一运行就会显示ViewController上面的内容。那我们先在ViewController.m添加一个背景图
片控件
//
//  ViewController.m
//  XQQ
//
//  Created by leehom on 14-11-12.
//  Copyright (c) 2014年 ___FULLUSERNAME___. All rights reserved.
//
#import "ViewController.h"
#import "LoginViewController.h"
@interface ViewController ()
@end
@implementation ViewController
- (void)viewDidLoad
{
    [super viewDidLoad];
	// Do any additional setup after loading the view, typically from a nib.
    UIImageView *imgBg = [[UIImageView alloc]initWithFrame:self.view.frame];
    imgBg.image = [UIImage imageNamed:@"splash.jpg"];
    [self.view addSubview:imgBg];
}
- (void)didReceiveMemoryWarning
{
    [super didReceiveMemoryWarning];
    // Dispose of any resources that can be recreated.
}
@end
这样就能在视图上面显示一张和屏幕大小的图片了。下面按F5,接着点运行按钮,模拟器效果图如下:
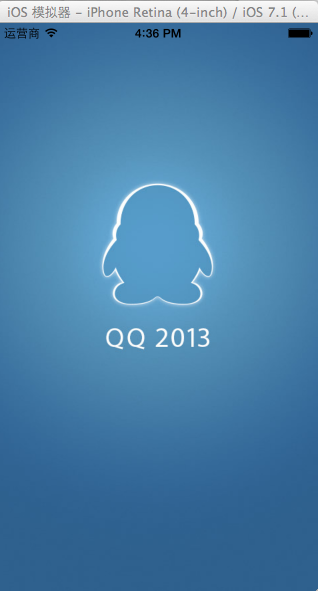
第一次测试就写到这里,后面继续……
本文链接:https://it72.com/215.htm