1、创建一个Empty Application工程,命名为:MultiView-Tab,如下图
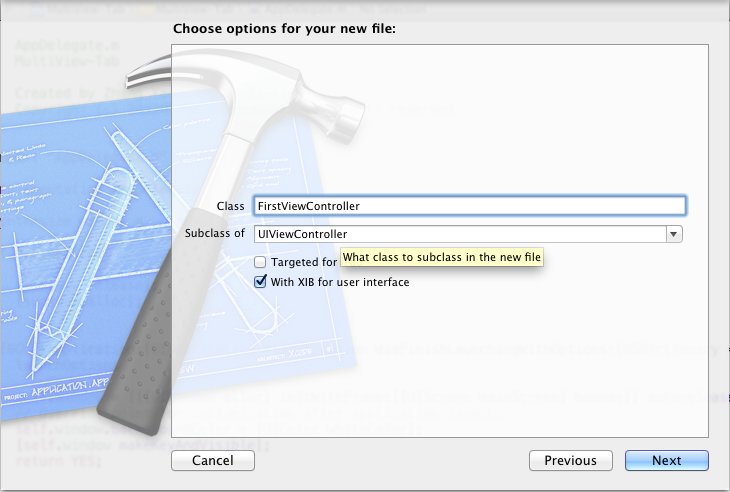
2、选中工程中的Group MultiView-Tab,然后按住CMD(Windows键)+N,新建视图控制器FirstViewController,如下图
3、依照上步操作,新建视图控制器SecondViewController
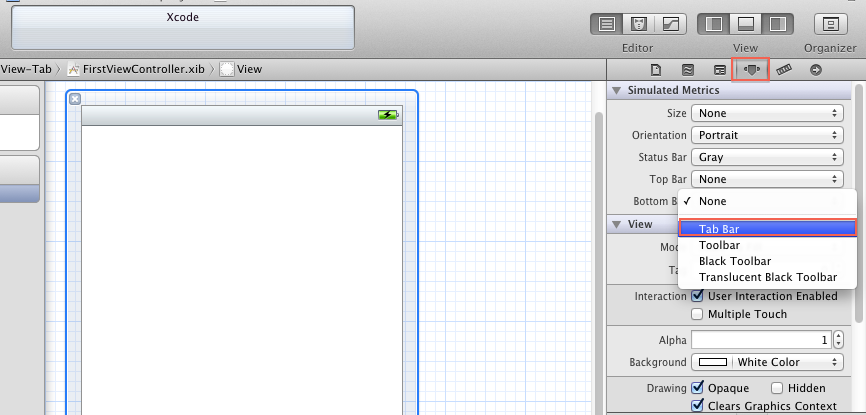
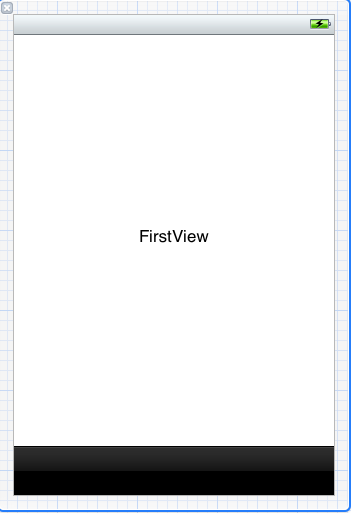
4、编辑FirstViewController.xib,在Bottom Bar显示出Tab Bar,然后添加一个Lable,如下图
5、依照上部操作,设置SecondViewController.xib
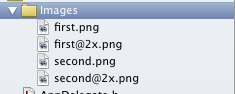
6、新建Group,名称为:Images,添加4张png图片
7、万事俱备,开始写代码,首先修改AppDelegate,添加一个UITabBarController类的实例,作为根视图控制器用。
AppDelegate.h修改后如下:
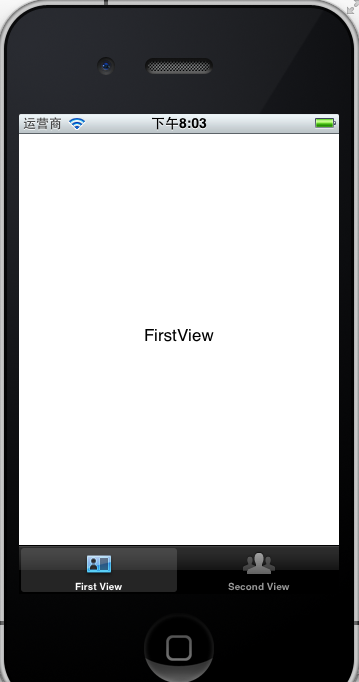
10、编译、运行,效果如下
总结:1)本文通过手工编写代码模拟了通过Tab Bar实现多视图切换;
2)Xcode提供了Tabbed Application模板,如下
基于该模板创建的工程就是Tab Bar实现的多视图应用程序,与本文实现的功能相同。
点击下载本文源代码

2、选中工程中的Group MultiView-Tab,然后按住CMD(Windows键)+N,新建视图控制器FirstViewController,如下图
3、依照上步操作,新建视图控制器SecondViewController
4、编辑FirstViewController.xib,在Bottom Bar显示出Tab Bar,然后添加一个Lable,如下图
5、依照上部操作,设置SecondViewController.xib
6、新建Group,名称为:Images,添加4张png图片
7、万事俱备,开始写代码,首先修改AppDelegate,添加一个UITabBarController类的实例,作为根视图控制器用。
AppDelegate.h修改后如下:
// // AppDelegate.h // MultiView-Tab // // Created by Zhang Yanguang on 12-11-20. // Copyright (c) 2012年 MyCompanyName. All rights reserved. // #importAppDelegate.m主要修改didFinishLaunchingWithOptions方法,修改后如下:#import "FirstViewController.h" #import "SecondViewController.h" @interface AppDelegate : UIResponder @property (strong, nonatomic) UIWindow *window; //添加代码 @property(strong,nonatomic) UITabBarController *tabBarController; @end
//
//  AppDelegate.m
//  MultiView-Tab
//
//  Created by Zhang Yanguang on 12-11-20.
//  Copyright (c) 2012年 MyCompanyName. All rights reserved.
//
#import "AppDelegate.h"
@implementation AppDelegate
@synthesize window = _window;
//添加代码
@synthesize tabBarController;
- (void)dealloc
{
    [_window release];
    [super dealloc];
}
- (BOOL)application:(UIApplication *)application didFinishLaunchingWithOptions:(NSDictionary *)launchOptions
{
    self.window = [[[UIWindow alloc] initWithFrame:[[UIScreen mainScreen] bounds]] autorelease];
    // Override point for customization after application launch.
    //添加代码

    //初始化firstViewController
    UIViewController *firstViewController = [[[FirstViewController alloc]initWithNibName:@"FirstViewController" bundle:nil] autorelease];
    //初始化secondViewController
    UIViewController *secondViewController = [[[SecondViewController alloc]initWithNibName:@"SecondViewController" bundle:nil] autorelease];

    self.tabBarController = [[[UITabBarController alloc]init] autorelease];
    self.tabBarController.viewControllers = [NSArray arrayWithObjects:firstViewController,secondViewController, nil];

    //设置tabBarController为根视图控制器
    self.window.rootViewController = tabBarController;
    self.window.backgroundColor = [UIColor whiteColor];
    [self.window makeKeyAndVisible];
    return YES;
}
- (void)applicationWillResignActive:(UIApplication *)application
{
    // Sent when the application is about to move from active to inactive state. This can occur for certain types of temporary interruptions (such as an incoming phone call or SMS message) or when the user quits the application and it begins the transition to the background state.
    // Use this method to pause ongoing tasks, disable timers, and throttle down OpenGL ES frame rates. Games should use this method to pause the game.
}
- (void)applicationDidEnterBackground:(UIApplication *)application
{
    // Use this method to release shared resources, save user data, invalidate timers, and store enough application state information to restore your application to its current state in case it is terminated later.
    // If your application supports background execution, this method is called instead of applicationWillTerminate: when the user quits.
}
- (void)applicationWillEnterForeground:(UIApplication *)application
{
    // Called as part of the transition from the background to the inactive state; here you can undo many of the changes made on entering the background.
}
- (void)applicationDidBecomeActive:(UIApplication *)application
{
    // Restart any tasks that were paused (or not yet started) while the application was inactive. If the application was previously in the background, optionally refresh the user interface.
}
- (void)applicationWillTerminate:(UIApplication *)application
{
    // Called when the application is about to terminate. Save data if appropriate. See also applicationDidEnterBackground:.
}
@end
8、修改FirstViewController.m,初始化时设置tabBarItem的title和显示的图片,仅修改方法initWithNibName,如下: - (id)initWithNibName:(NSString *)nibNameOrNil bundle:(NSBundle *)nibBundleOrNil
{
self = [super initWithNibName:nibNameOrNil bundle:nibBundleOrNil];
if (self) {
// Custom initialization
self.title = @"First View";
self.tabBarItem.image = [UIImage imageNamed:@"first"];
}
return self;
} 9、依照上步修改SecondViewController.m,如下: - (id)initWithNibName:(NSString *)nibNameOrNil bundle:(NSBundle *)nibBundleOrNil
{
self = [super initWithNibName:nibNameOrNil bundle:nibBundleOrNil];
if (self) {
// Custom initialization
self.title = @"Second View";
self.tabBarItem.image = [UIImage imageNamed:@"second"];
}
return self;
} 10、编译、运行,效果如下
总结:1)本文通过手工编写代码模拟了通过Tab Bar实现多视图切换;
2)Xcode提供了Tabbed Application模板,如下
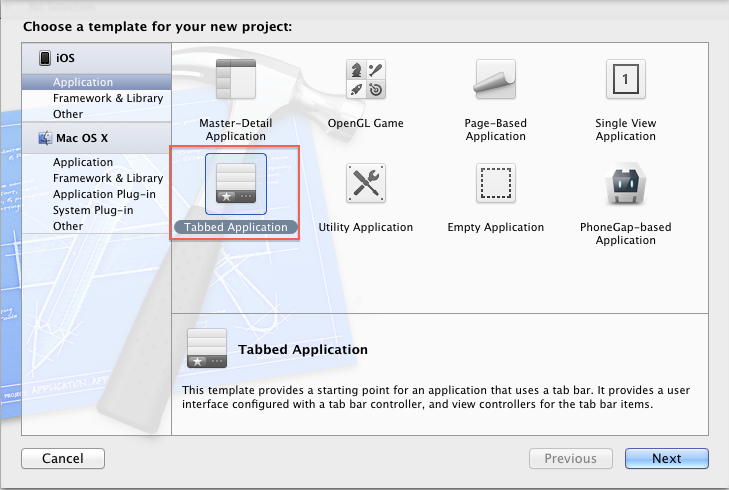
基于该模板创建的工程就是Tab Bar实现的多视图应用程序,与本文实现的功能相同。
点击下载本文源代码
收藏的用户(0) X
正在加载信息~
推荐阅读
最新回复 (0)
站点信息
- 文章2306
- 用户1336
- 访客11530991
每日一句
Your silent march through storms writes peace upon our land.
你穿越风暴的无声行进,在大地写下和平。
你穿越风暴的无声行进,在大地写下和平。
新会员