先新建一个demo,取名TabViewTest(原谅我吧- -,本来要取名TableViewTest,谁知脑抽新建项目的时候写错了,诶。。。算了,将错就错吧- -)
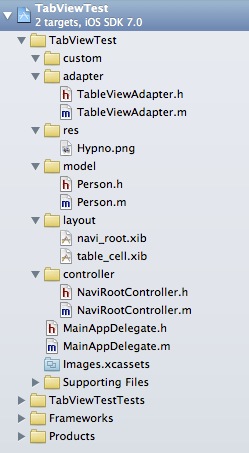
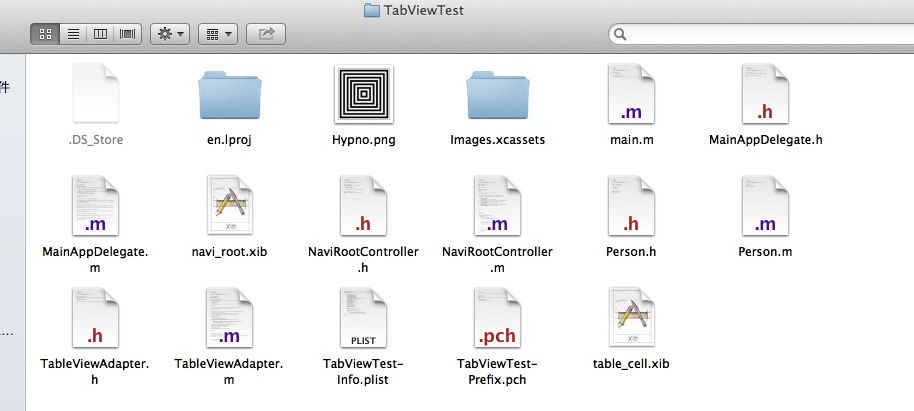
ios没有命名空间的概念,没有包概念(这也是为什么ios中的类都有前缀的原因,比如NS等),所以上面像“包”一样的文件夹都是我自己新建的“group”,只是为了看起来比较有分层的概念而已,打开finder,到项目文件里一看如下图,妈呀- -,所有的类都挤在一个文件夹里面。。。这是我觉得蛋疼的地方之一-。-
再回来看看我们项目结构,我分的几个group,如果我把controller这个group的名字改成“activity”,android开发者肯定有种似曾相识的感觉了:
controller:控制层group,相当于android中的activity
layout:布局group,相当于android中res目录下的layout(xml布局文件)
model:这个不用说就知道放了什么东西了,经典的Person这个测试用的数据结构
adapter:为了还念android中的适配器,然后我就取了这么个group名字
好了,现在正式开始代码的编写
打开MainAppDelegate.m,它实现了UIApplicationDelegate协议,所以可以在该类中实现应用状态的回调函数
在application:didFinishLaunchingWithOptions:方法(应用程序启动时回调该方法)中来设置它的RootController(根控制器,不知道这样翻译专不专业- -),我的实现是生成一个UINavigationController作为它的root controller,然后把自己新建的一个NaviRootController(在这个Controller中放入一个UITableView,具体下面会讲到)作为UINavigationController的root view,具体代码如下(这个不是我们本次的重点,所以一笔带过):
- (BOOL)application:(UIApplication *)application didFinishLaunchingWithOptions:(NSDictionary *)launchOptions
{
    self.window = [[UIWindow alloc] initWithFrame:[[UIScreen mainScreen] bounds]];
    // 生成UINavigationController对象,并设置它的RootController
    UINavigationController *naviController = [[UINavigationController alloc] initWithRootViewController:[[NaviRootController alloc] init]];
    // 然后把NavigationController设置为window的RootViewController
    [self.window setRootViewController:naviController];

    self.window.backgroundColor = [UIColor whiteColor];
    [self.window makeKeyAndVisible];
    return YES;
}
然后,重点就是NaviRootController这个Controller了,
新建NaviRootController,继承UIViewController,在.h文件中:
声明一个NSMutableArray对象data作为tableView的数据源(相当于在android中经常用到的ArrayList
声明一个用于适配和绑定tableView数据的适配器TableViewAdapter *adapter(这个类是我自己写的,下面会讲到。java中要实现ListView中的数据绑定适配,也要通过一个继承于BaseAdapter的适配器进行数据的适配吧,也很好理解)
声明一个UITableView对象(相当于android中,在activity中声明一个private ListView listView;)
具体代码如下:
// // NaviRootController.h // TabViewTest // // Created by WANGJIE on 13-10-31. // Copyright (c) 2013年 WANGJIE. All rights reserved. // #import@class TableViewAdapter; @interface NaviRootController : UIViewController { NSMutableArray *data; TableViewAdapter *adapter; } @property (weak, nonatomic) IBOutlet UITableView *tableView; @property NSMutableArray *data; @property(strong, nonatomic) TableViewAdapter *adapter; @end
好了,声明部分到此为止,接下来看看实现部分
刚刚在MainAppDelegate中,生成了一个NaviRootController对象,然后把这个对象加入到了UINavigationController对象的rootViewController。生成NaviRootController对象的时候,调用了init方法,我们应该在init方法里面去初始化布局,如下:
- (id)init
{
    self = [self initWithNibName:@"navi_root" bundle:nil];
    return self;
}
- (id)initWithNibName:(NSString *)nibNameOrNil bundle:(NSBundle *)nibBundleOrNil
{
    self = [super initWithNibName:nibNameOrNil bundle:nibBundleOrNil];
    if (self) {
        // 获得当前导航栏对象
        UINavigationItem *item = [self navigationItem];
        // 设置导航栏左按钮
        UIBarButtonItem *leftButton = [[UIBarButtonItem alloc] initWithTitle:@"leftButton" style:UIBarButtonItemStylePlain target:self action:@selector(buttonClickedAction:)];
        [leftButton setTag:0];
        [item setLeftBarButtonItem:leftButton animated:YES];
        // 设置导航栏右按钮
        UIBarButtonItem *rightButton = [[UIBarButtonItem alloc] initWithTitle:@"rightButton" style:UIBarButtonItemStyleDone target:self action:@selector(buttonClickedAction:)];
        [rightButton setTag:1];
        [item setRightBarButtonItem:rightButton animated:YES];
    }
    return self;
}
我们在init方法中调用了initWithNibName:bundle:方法,传入了NibName这个字符串,这个是什么?Nib是ios里面的布局文件,也就是相当于android中类似main.xml这种布局文件吧,现在传进去的时nibname,也就是布局文件的名称。所以,没错,传入这个参数后,当前的controller(也就是NaviRootController就跟传入的这个布局文件绑定起来了,类似于android中activity中熟悉的setContentView(R.layout.main)一样!)
然后我们顺便看看navi_root.xib这个布局文件:
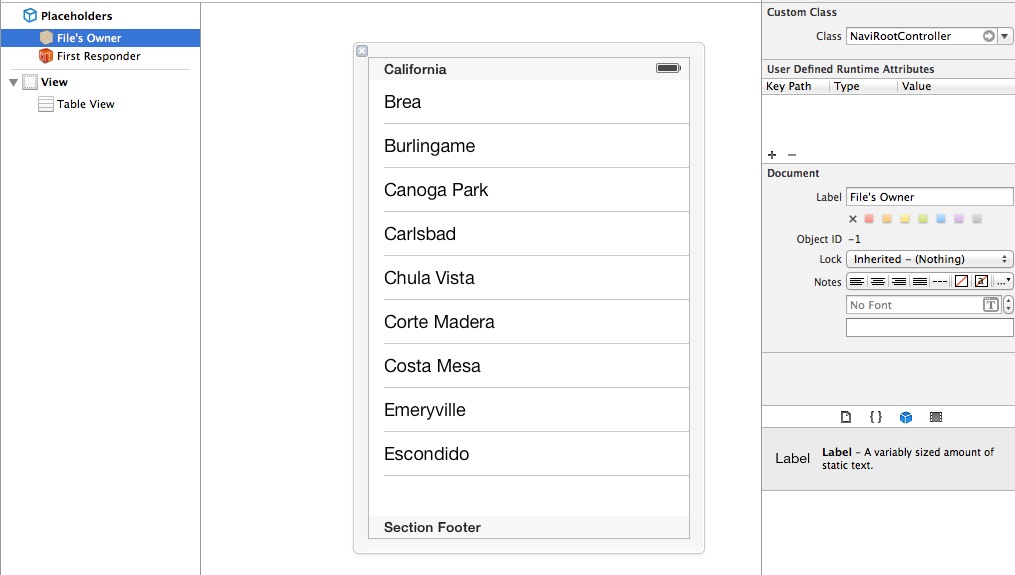
整个界面就一个UITableView,对了,别忘了在File's Owner中把custom class改成NaviRootController。键盘按住control,用鼠标拖动左边栏的“Table View”到NaviRootController.h中,会自动生成UITableView声明,并自动绑定。
接下来回到NaviRootController的初始化方法中。
initWithNibName:bundle:方法中后面的UINavigationItem相关的代码是用来设置导航栏左边和右边的按钮,既然是个demo,所以也没什么特别的功能,就是点击下,跳出一个UIAlertView提示下,所以一笔带过。
此时界面布局和controller已经绑定起来了,现在的任务应该是初始化UITableView的数据,也就是上面的data属性,但是在哪里初始化比较好呢?
刚开始,我是直接在init方法中直接去初始化数据,但是失败了,不管在init方法中初始化多少次(data调用多少次addObject方法),data的值永远都是nil(相当于在android中,不管调用多少次list.add(...)方法,list中一条数据也没有加入!),猜测是因为在init方法中的时候属性和控件都还没有被初始化。
最后我的解决办法就是在viewDidLoad方法中去加载数据。viewDidLoad这个回调方法是会在控件加载完毕后调用,所以,我认为在这里去加载数据和做控件的初始化操作是比较合理的。
viewDidLoad方法实现如下:
- (void)viewDidLoad
{

    // Do any additional setup after loading the view.
    [super viewDidLoad];

    if (!adapter) {
        [self initData];

        // 生成适配器委托对象
        adapter = [[TableViewAdapter alloc] initWithSource:data Controller:self];

        // 设置适配器委托对象
        [[self tableView] setDelegate:adapter];
        [[self tableView] setDataSource:adapter];

    }
}
如上,在viewDidLoad中,我先去初始化数据(demo中的实现其实就是循环了14次,往data中加了14个Person对象),然后生成一个适配器委托对象,传入data(数据源)和self(当前controller对象),相当于android中的 adapter = new MyAdapter(list, this);有木有??!!
然后,setDelegate用来设置委托对象(相当于android中的listView.setAdapter(adapter)),setDataSource用来设置数据源。
这里,完整地列出NaviRootController的代码:
//
//  NaviRootController.m
//  TabViewTest
//
//  Created by WANGJIE on 13-10-31.
//  Copyright (c) 2013年 WANGJIE. All rights reserved.
//
#import "NaviRootController.h"
#import "Person.h"
#import "TableViewAdapter.h"
@interface NaviRootController ()
@end
@implementation NaviRootController
@synthesize data, adapter;
- (id)init
{
    self = [self initWithNibName:@"navi_root" bundle:nil];
    return self;
}
- (id)initWithNibName:(NSString *)nibNameOrNil bundle:(NSBundle *)nibBundleOrNil
{
    self = [super initWithNibName:nibNameOrNil bundle:nibBundleOrNil];
    if (self) {
        // Custom initialization
        // 获得当前导航栏对象
        UINavigationItem *item = [self navigationItem];
        // 设置导航栏左按钮
        UIBarButtonItem *leftButton = [[UIBarButtonItem alloc] initWithTitle:@"leftButton" style:UIBarButtonItemStylePlain target:self action:@selector(buttonClickedAction:)];
        [leftButton setTag:0];
        [item setLeftBarButtonItem:leftButton animated:YES];
        // 设置导航栏右按钮
        UIBarButtonItem *rightButton = [[UIBarButtonItem alloc] initWithTitle:@"rightButton" style:UIBarButtonItemStyleDone target:self action:@selector(buttonClickedAction:)];
        [rightButton setTag:1];
        [item setRightBarButtonItem:rightButton animated:YES];


    }
    return self;
}
/**
 * 初始化列表数据
 */
- (void)initData
{
    data = [[NSMutableArray alloc] init];
    NSLog(@"%@", NSStringFromSelector(_cmd));
    Person *person;
    for (int i = 0; i < 14; i++) {
        person = [[Person alloc] init];
        [person setName:[@"name" stringByAppendingString:
                         [NSString stringWithFormat:@"%d", i]
                         ]
         ];

        [person setAge:i + 10];

        [person setPic:[UIImage imageNamed:@"Hypno.png"]];

        [data addObject:person];

    }
}

- (void)viewDidLoad
{

    // Do any additional setup after loading the view.
    [super viewDidLoad];

    if (!adapter) {
        [self initData];

        // 生成适配器委托对象
        adapter = [[TableViewAdapter alloc] initWithSource:data Controller:self];

        // 设置适配器委托对象
        [[self tableView] setDelegate:adapter];
        [[self tableView] setDataSource:adapter];

    }


}
- (void)viewWillAppear:(BOOL)animated
{
    [super viewWillAppear:YES];

}
- (void)didReceiveMemoryWarning
{
    [super didReceiveMemoryWarning];
    // Dispose of any resources that can be recreated.
}
// 按钮点击事件回调
- (void)buttonClickedAction:(id)sender
{

    NSString *message;
    switch ([sender tag]) {
        case 0:
            message = @"left button clicked!";
            break;
        case 1:
            message = @"right button clicked!";
            break;
        default:
            message = @"unknow button clicked!";
            break;
    }

    UIAlertView *alert = [[UIAlertView alloc] initWithTitle:@"alert view" message:message delegate:self cancelButtonTitle:@"cancel" otherButtonTitles:nil, nil];
    [alert show];
}


@end
好了,UITableView的初始化准备工作到此就做完了,现在干嘛?
当然去编写TableViewAdapter这个类啊。数据源有了(并且初始化完毕),用以显示的控件(UITableView)有了(并且初始化完毕),而且两个还已经绑定起来了。但是还缺的就是一个角色,这个角色可以把数据源中的数据跟控件中某个相应的子控件适配起来。比如数据源中有4个数据,A、B、C、D,控件有one、two、three、four这4个控件,这个角色的任务就是告诉one:你要显示的数据是A;告诉two:你要显示的数据是B;告诉three:你要显示的数据是C;告诉four:你要显示的数据是D!
这个角色就是适配器!也就是下面要说的那个TableViewAdapter
新建TableViewAdapter,实现<UITableViewDataSource, UITableViewDelegate>这两个协议(android中适配器不同的是要继承BaseAdapter类)。声明一个数据源data,这个数据源是从NaviRootController中传过来的已经初始化好了的数据源,还有一个声明是NaviRootController对象传过来的self(需要什么,就让调用者传什么过来,这个应该都懂的-。-),另外还有一个自己写的初始化方法(自己写初始化方法init打头的方法就行,不像java中的构造方法,方法名要跟类名相同,不过这些都是换汤不换药)
然后看看TableViewAdapter的实现类(.m)
实现了这两个协议后,你就能覆写里面的一些UITableView的回调方法了,比如:
tableView:numberOfRowsInSection:方法,返回数据源的数量就行了(类似android的adapter中自己要实现的getCount()方法!)
tableView:cellForRowAtIndexPath:这个是方法是这里最关键的一个方法了,就是在这里进行数据的适配工作(类似android的adapter中自己要实现的getView()方法!),这里返回的UITableViewCell就是类表中的一项(类似android中listview的一个item),这个一项的布局,已经在table_cell.xib文件中布局完毕,如下:
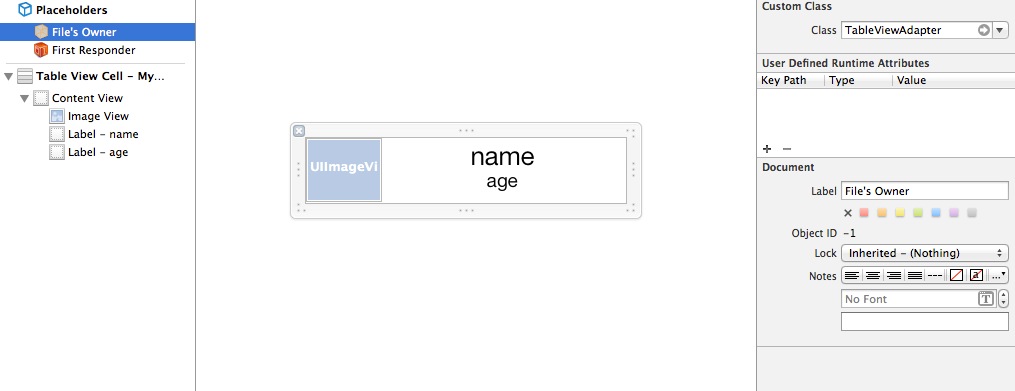
设置File's Owner为TableViewAdapter,设置Table View Cell的identifier设置为“MyTableCell”,这个可以任意取名,但是要跟后面的方法实现中统一(跟哪里统一?作用是神马?这些下面会讲到,别急-。-),接着设置ImageView的tag为1,nameLabel的tag为2,ageLabel的tag为3(tag的作用,下面也会讲到)。
接着,回到tableView:cellForRowAtIndexPath:这个方法,它的实现如下所示:
- (UITableViewCell *)tableView:(UITableView *)tableView cellForRowAtIndexPath:(NSIndexPath *)indexPath
{
    Person *p = [data objectAtIndex:[indexPath row]];
    UITableViewCell *cell = [tableView dequeueReusableCellWithIdentifier:@"MyTableCell"];
    if (!cell) {
        NSArray *nibViews = [[NSBundle mainBundle] loadNibNamed:@"table_cell" owner:self options:nil];
        cell = [nibViews objectAtIndex:0];
    }
    UIImageView *picIv = (UIImageView *)[cell viewWithTag:1];
    UILabel *nameLb = (UILabel *)[cell viewWithTag:2];
    UILabel *ageLb = (UILabel *)[cell viewWithTag:3];

    [nameLb setText:[p name]];
    [ageLb setText:[NSString stringWithFormat:@"%d", [p age]]];
    [picIv setImage:[p pic]];

    return cell;
}
如上图所示:
第3行,是用于获得所要显示的数据Person对象(这里的[indexPath row]相当于android的adapter的getView方法的position参数。indexPath中有两个参数,row和section,表示行和列,因为我们现在是要显示一个列表,所以只需要row这个参数就可以了)
第4行,是用于资源的重复利用,根据标示符“MyTableCell”去获得一个可再利用的UITableViewCell(这里的标示符就要跟前面在xib文件中设置的标示符要一致,这样才能被识别到,然后在这里被获取到),如果没有获得到,就去新创建一个UITableViewCell。
第6、7行,是创建新的UITableViewCell的代码,通过mianBundle的loadNibNamed:owner:options方法根据xib的名字去创建(跟android中的LayoutInflater.inflate()方法通过R.layout.xxx的方法创建类似),loadNibNamed:owner:options返回的是一个数组,得到第一个就是UITableViewCell了。
第10、11、12行,是获取到或者新建的cell通过控件之前设置的tag来获得相应地子控件(现在知道之前为什么要设置xib文件中控件的tag了吧?这个跟android中的findViewByTag/findViewById又是很类似的!)
第14、15、16行,是为刚刚获得的cell中的子控件适配数据,让它可以把数据显示出来。
第18行,把生成数据适配完毕的UITableViewCell返回出去(这跟android中的也是很类似)
TableViewAdapter代码如下:
//
//  TableViewAdapter.m
//  TabViewTest
//
//  Created by WANGJIE on 13-10-31.
//  Copyright (c) 2013年 WANGJIE. All rights reserved.
//
#import "TableViewAdapter.h"
#import "Person.h"
#import "NaviRootController.h"
@implementation TableViewAdapter
- (id)initWithSource:(NSMutableArray *)source Controller:(NaviRootController *)context
{
    NSLog(@"initWithSource...");
    self = [super init];
    if (self) {
        data = source;
        controller = context;
    }
    return self;
}
- (NSInteger)tableView:(UITableView *)tableView numberOfRowsInSection:(NSInteger)section
{
    return [data count];
}
- (UITableViewCell *)tableView:(UITableView *)tableView cellForRowAtIndexPath:(NSIndexPath *)indexPath
{
    NSLog(@"%@", NSStringFromSelector(_cmd));
//    UITableViewCell *cell = [tableView dequeueReusableCellWithIdentifier:@"UITableViewCell"];
//    if (!cell) {
//        cell = [[UITableViewCell alloc] initWithStyle:UITableViewCellStyleDefault reuseIdentifier:@"UITableViewCell"];
//    }
    // 获得当前要显示的数据
    Person *p = [data objectAtIndex:[indexPath row]];
//
//    [[cell textLabel] setText:[p name]];
    // 记得在cell.xib文件中设置identifier以达到重用的目的
    UITableViewCell *cell = [tableView dequeueReusableCellWithIdentifier:@"MyTableCell"];
    if (!cell) {
        // 通过mainBundle的loadNibNamed方法去加载布局,类似android中的LayoutInflater.inflate()方法
        NSArray *nibViews = [[NSBundle mainBundle] loadNibNamed:@"table_cell" owner:self options:nil];
        cell = [nibViews objectAtIndex:0];
//        cell.selectionStyle = UITableViewCellSelectionStyleNone;
    }
    // 通过在cell.xib中各控件设置的tag来获得控件,类似android中的findViewByTag/findViewById
    UIImageView *picIv = (UIImageView *)[cell viewWithTag:1];
    UILabel *nameLb = (UILabel *)[cell viewWithTag:2];
    UILabel *ageLb = (UILabel *)[cell viewWithTag:3];

    [nameLb setText:[p name]];
    [ageLb setText:[NSString stringWithFormat:@"%d", [p age]]];
    [picIv setImage:[p pic]];


    return cell;
}

- (void)tableView:(UITableView *)tableView didSelectRowAtIndexPath:(NSIndexPath *)indexPath
{
    Person *person = [data objectAtIndex:[indexPath row]];
    UIAlertView *alert = [[UIAlertView alloc] initWithTitle:@"cell clicked!" message:[NSString stringWithFormat:@"%@ clicked!", [person name]]delegate:self cancelButtonTitle:@"cancel" otherButtonTitles:nil, nil];
    [alert show];
}
- (CGFloat)tableView:(UITableView *)tableView heightForRowAtIndexPath:(NSIndexPath *)indexPath
{
    return [self tableView:tableView cellForRowAtIndexPath:indexPath].frame.size.height;
}

@end
好了!到此为止整个UITableView实现的流程基本完成了,可以看出跟android的ListView和GridView的实现流程很相似,理解了其中一个,另一个也能很好的理解它的工作流程。
最后来一张效果图: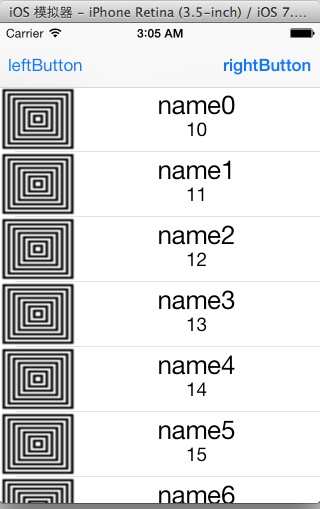
- 文章2321
- 用户1336
- 访客12207008
樱花在盛开前先红了脸颊。